hotline_oh
-
Posts
675 -
Joined
-
Last visited
-
Days Won
41
Everything posted by hotline_oh
-
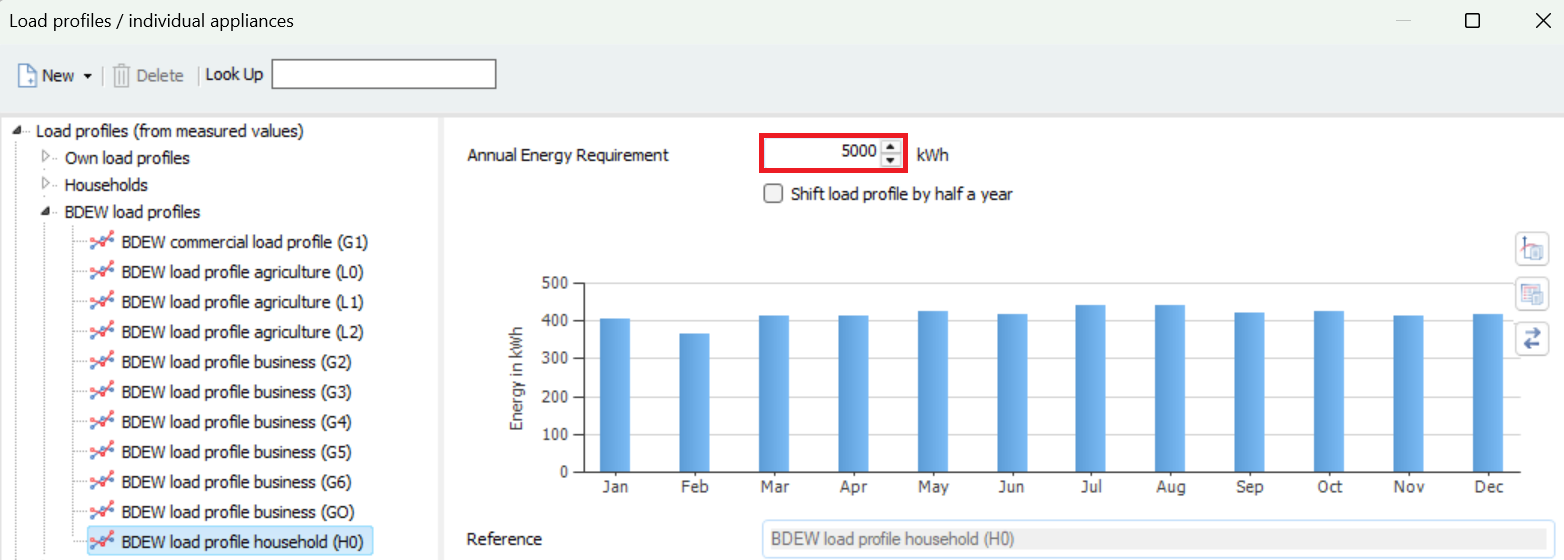
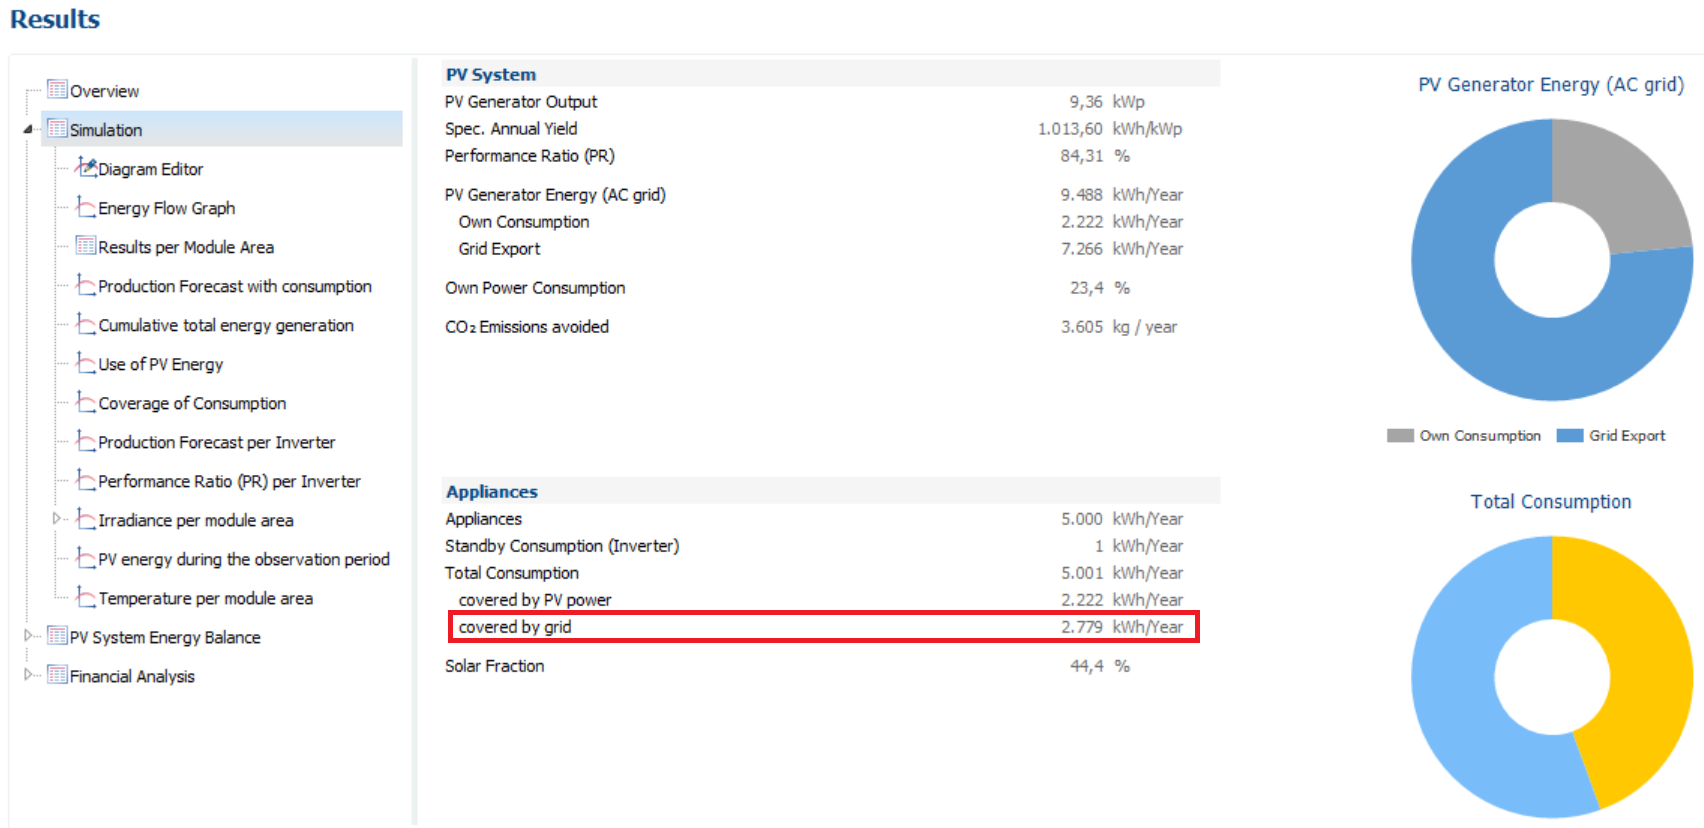
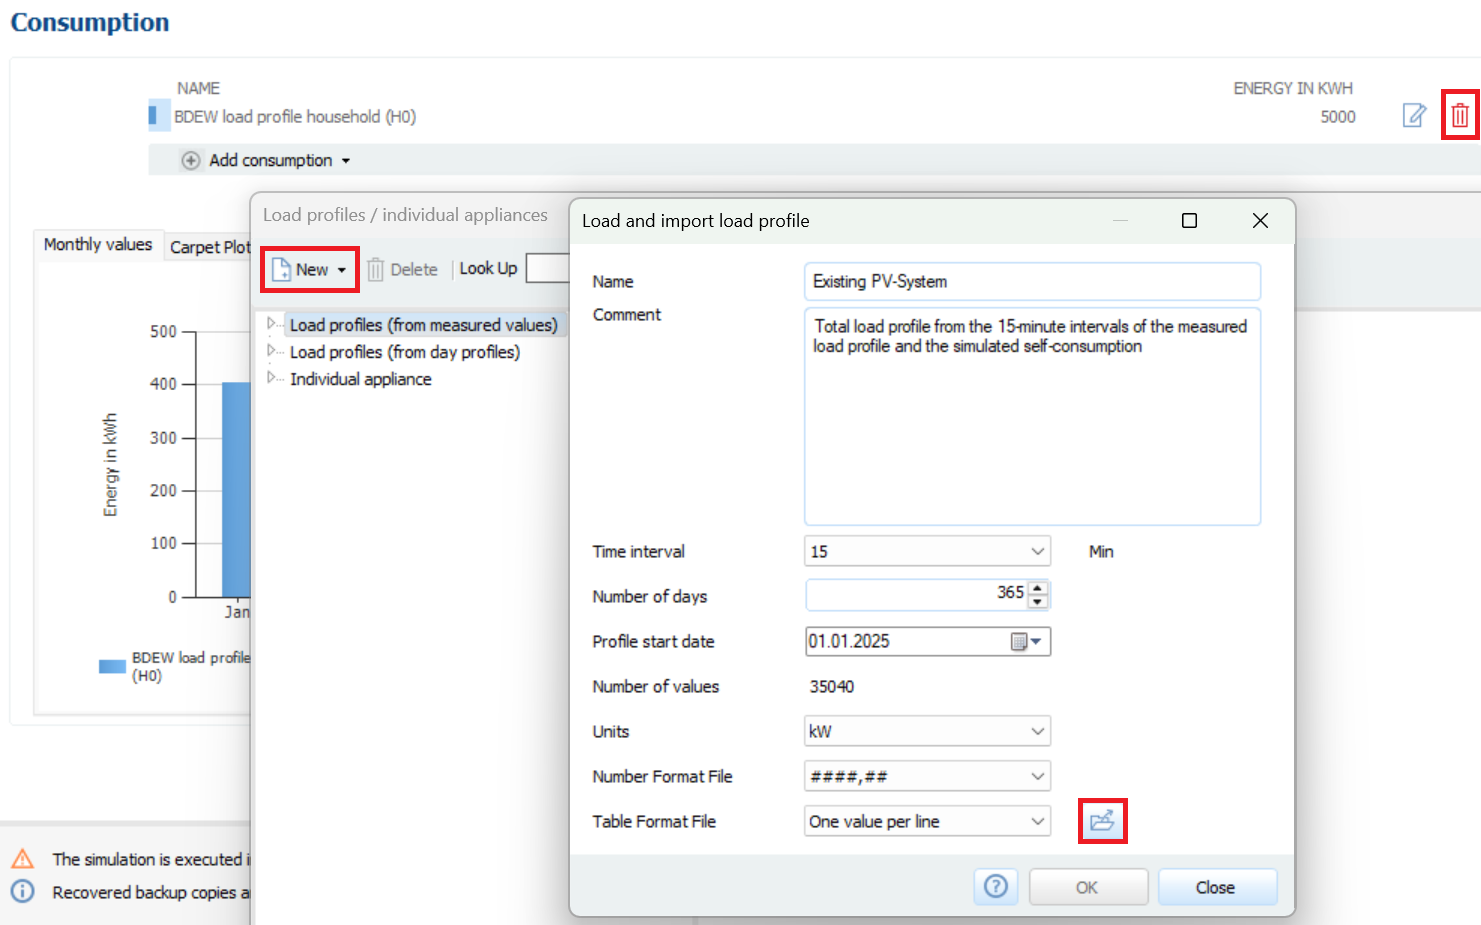
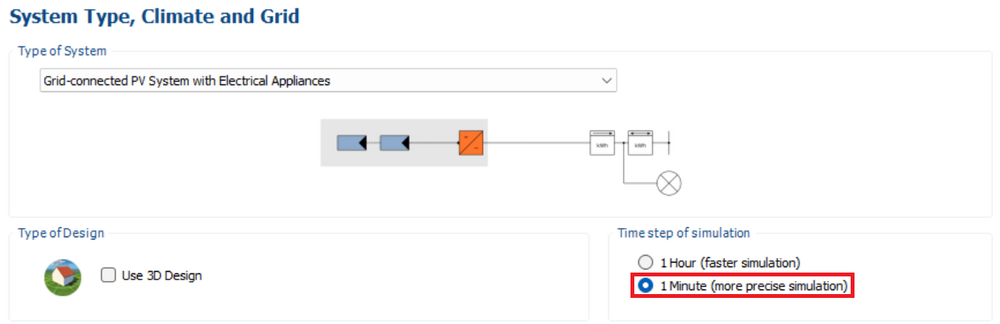
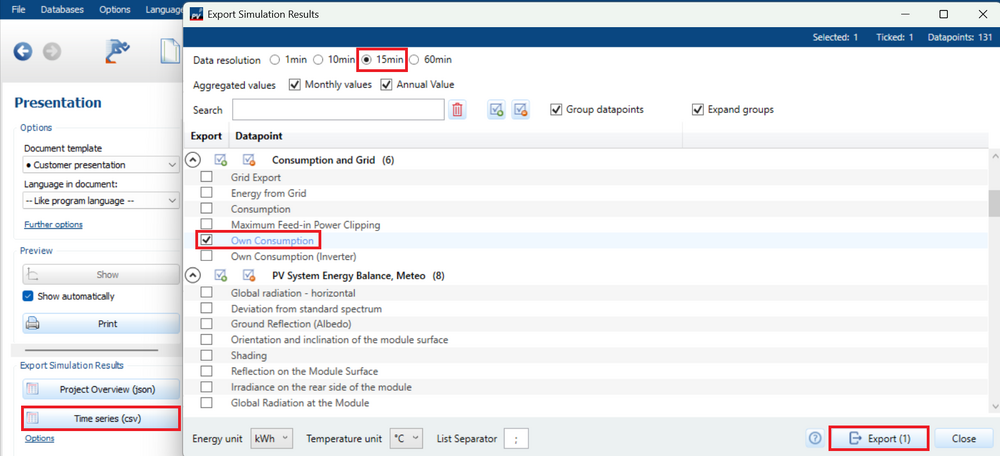
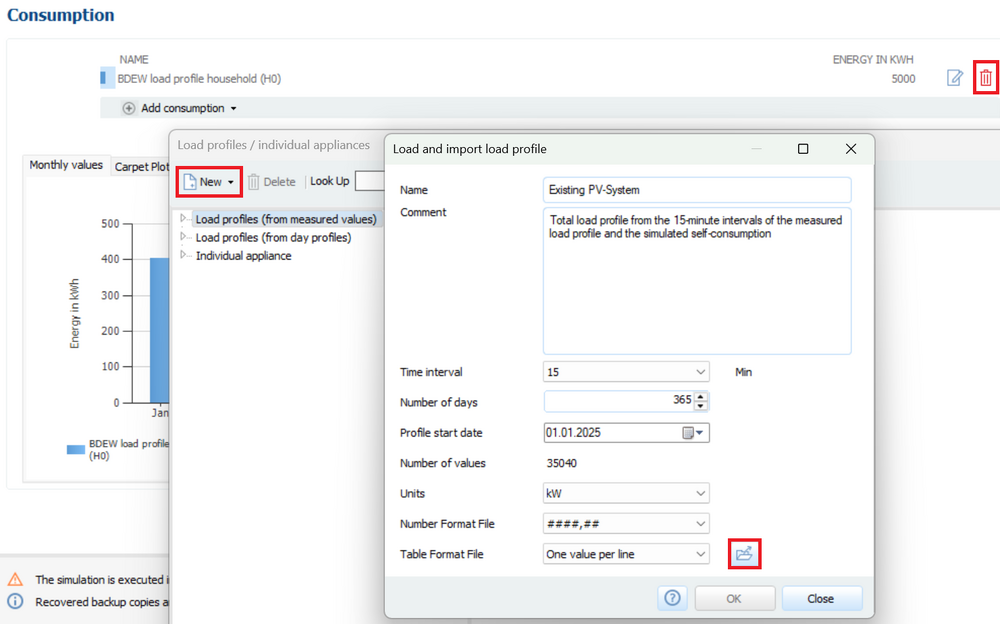
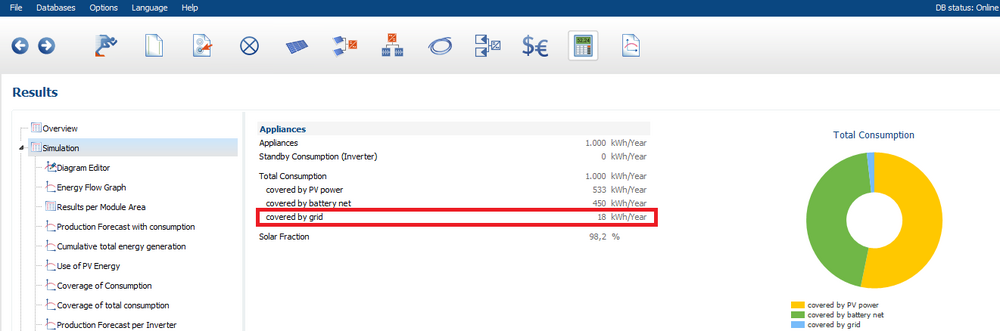
 An existing system is to be retrofitted with a storage system. A PV-adjusted load profile with 15-minute values for a full year is available. To take the PV-adjusted load profile (consumption profile minus PV self-consumption) into account, you need to perform two simulations. You model the installed PV system (taking module degradation into account, depending on how long the system has been operating) and use a standard consumption profile stored in PV*SOL that best matches your consumption type. Estimate the annual electricity demand: For the simulation, select the 1-minute time step. In the results, check whether the value "Total consumption – covered by grid" matches the annual total of your measured load profile. If the deviation exceeds 10%, adjust the annual electricity demand in the consumption profile and run the simulation again: Next, export the self-consumption data in 15-minute intervals. In Excel, add the 15-minute intervals of the measured load profile and the simulated self-consumption. For storage system design, you can now import your total load profile into PV*SOL. Delete the previously selected default load profile. Further information on importing load profiles can be found in our help documentation.
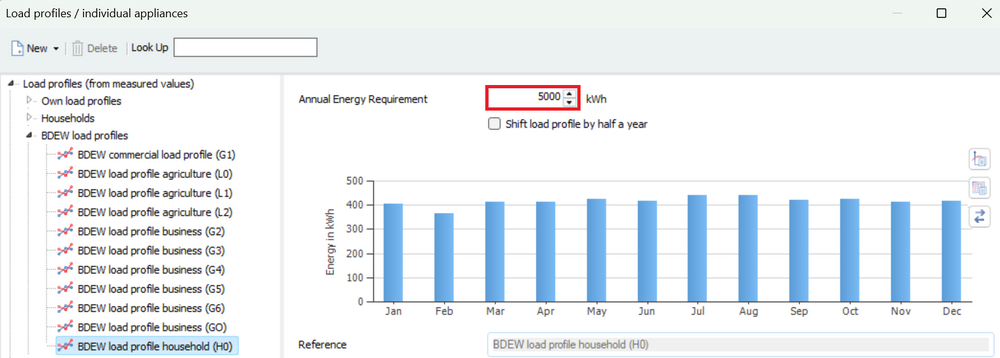

-
Select the ‘SolarEdge’ configuration option and first pre-select the inverter(s): Then pre-select the power optimizer(s): You can then use the button, which is now active, to generate an automatic configuration proposal featuring SolarEdge inverters and SolarEdge optimizers: For older program versions (up to 2021), a short tutorial video on polystring and power optimizer configuration is available here:


-
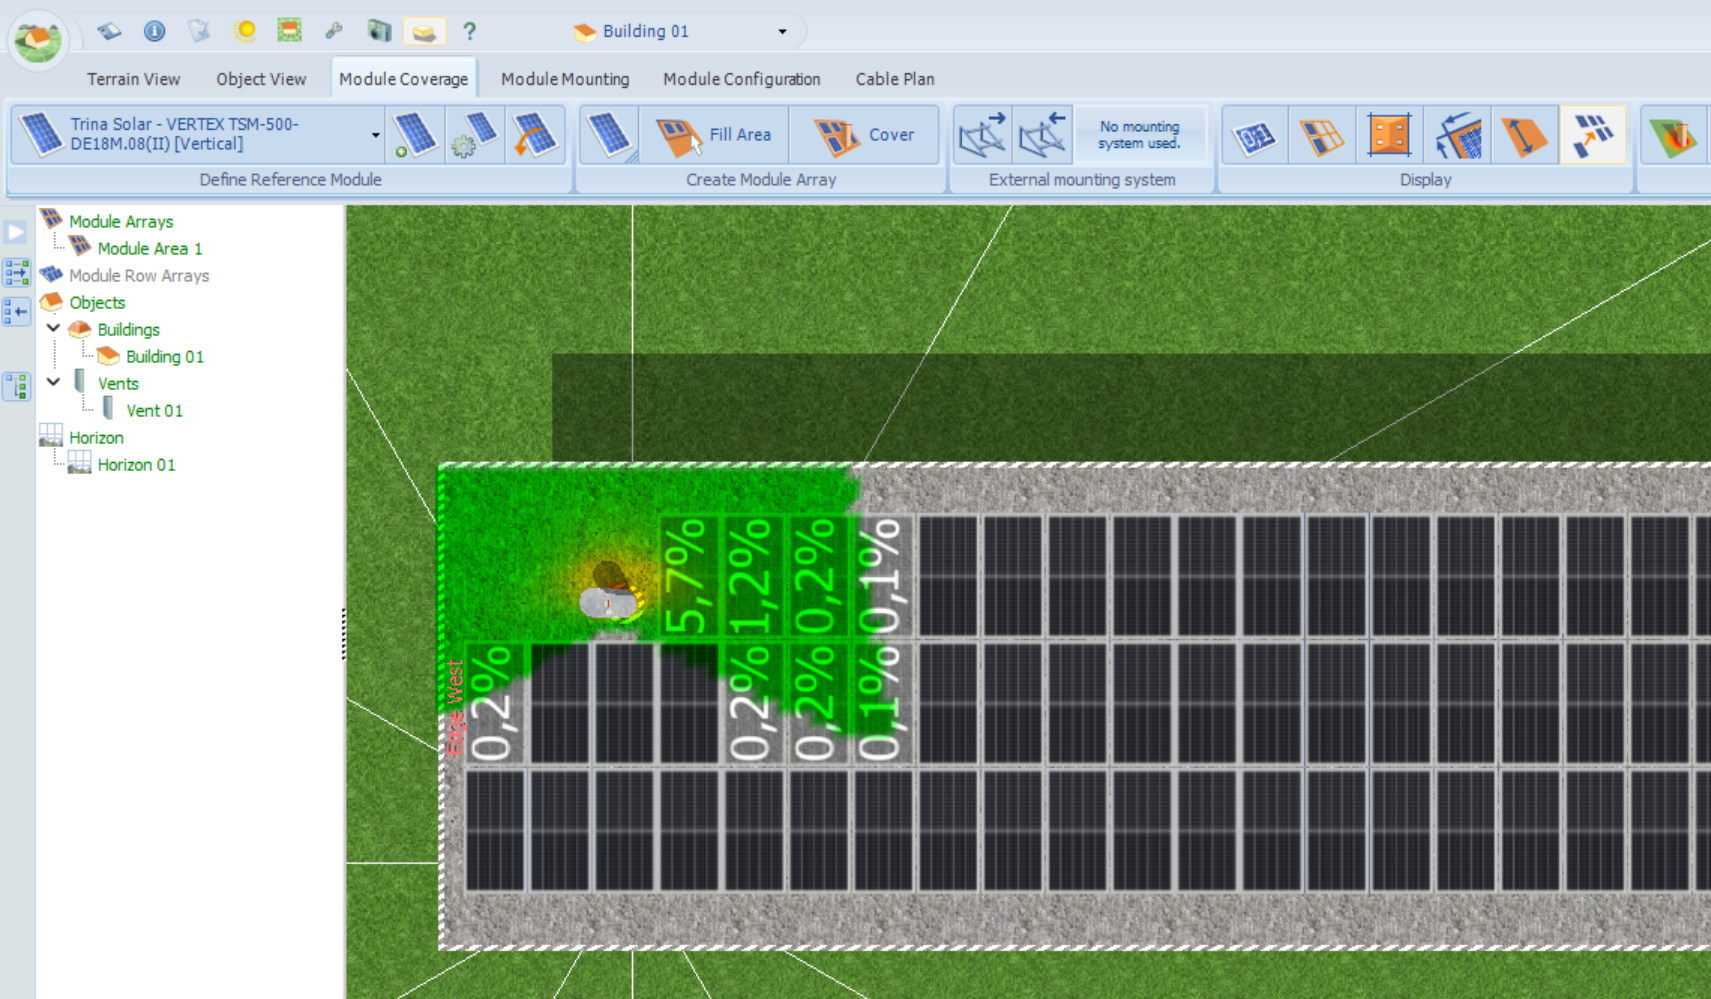
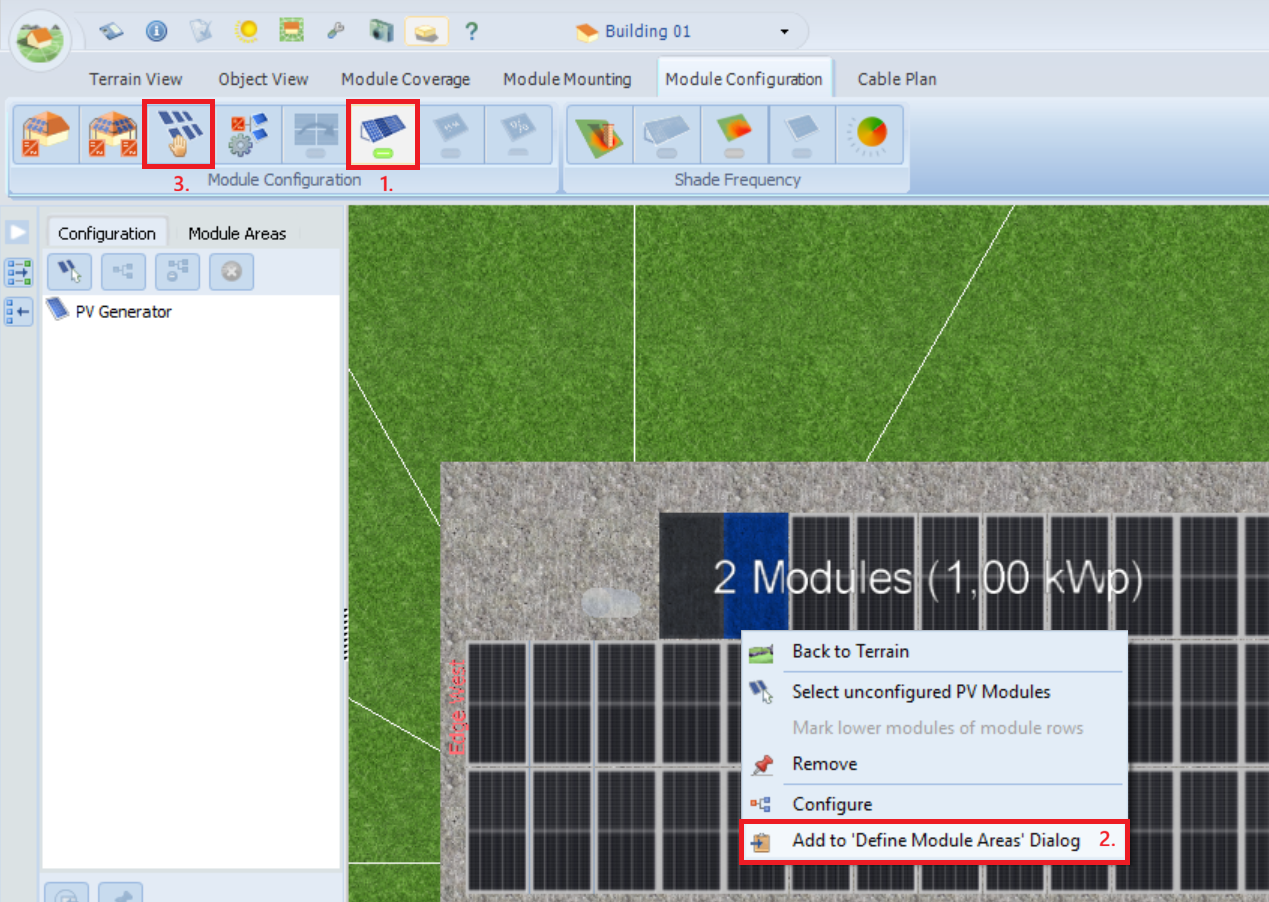
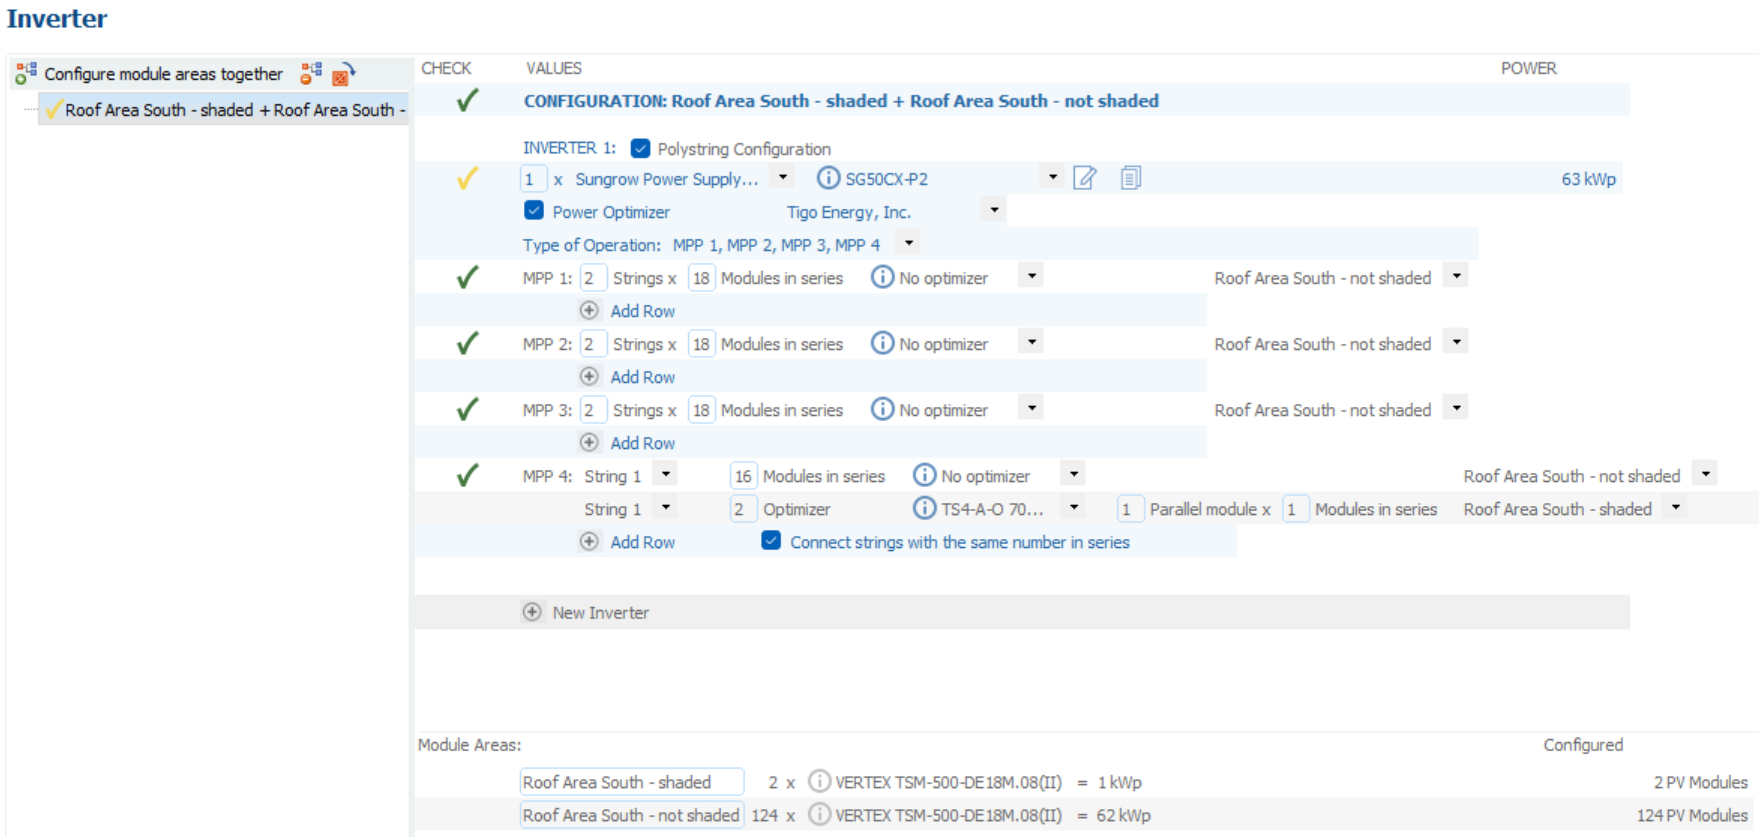
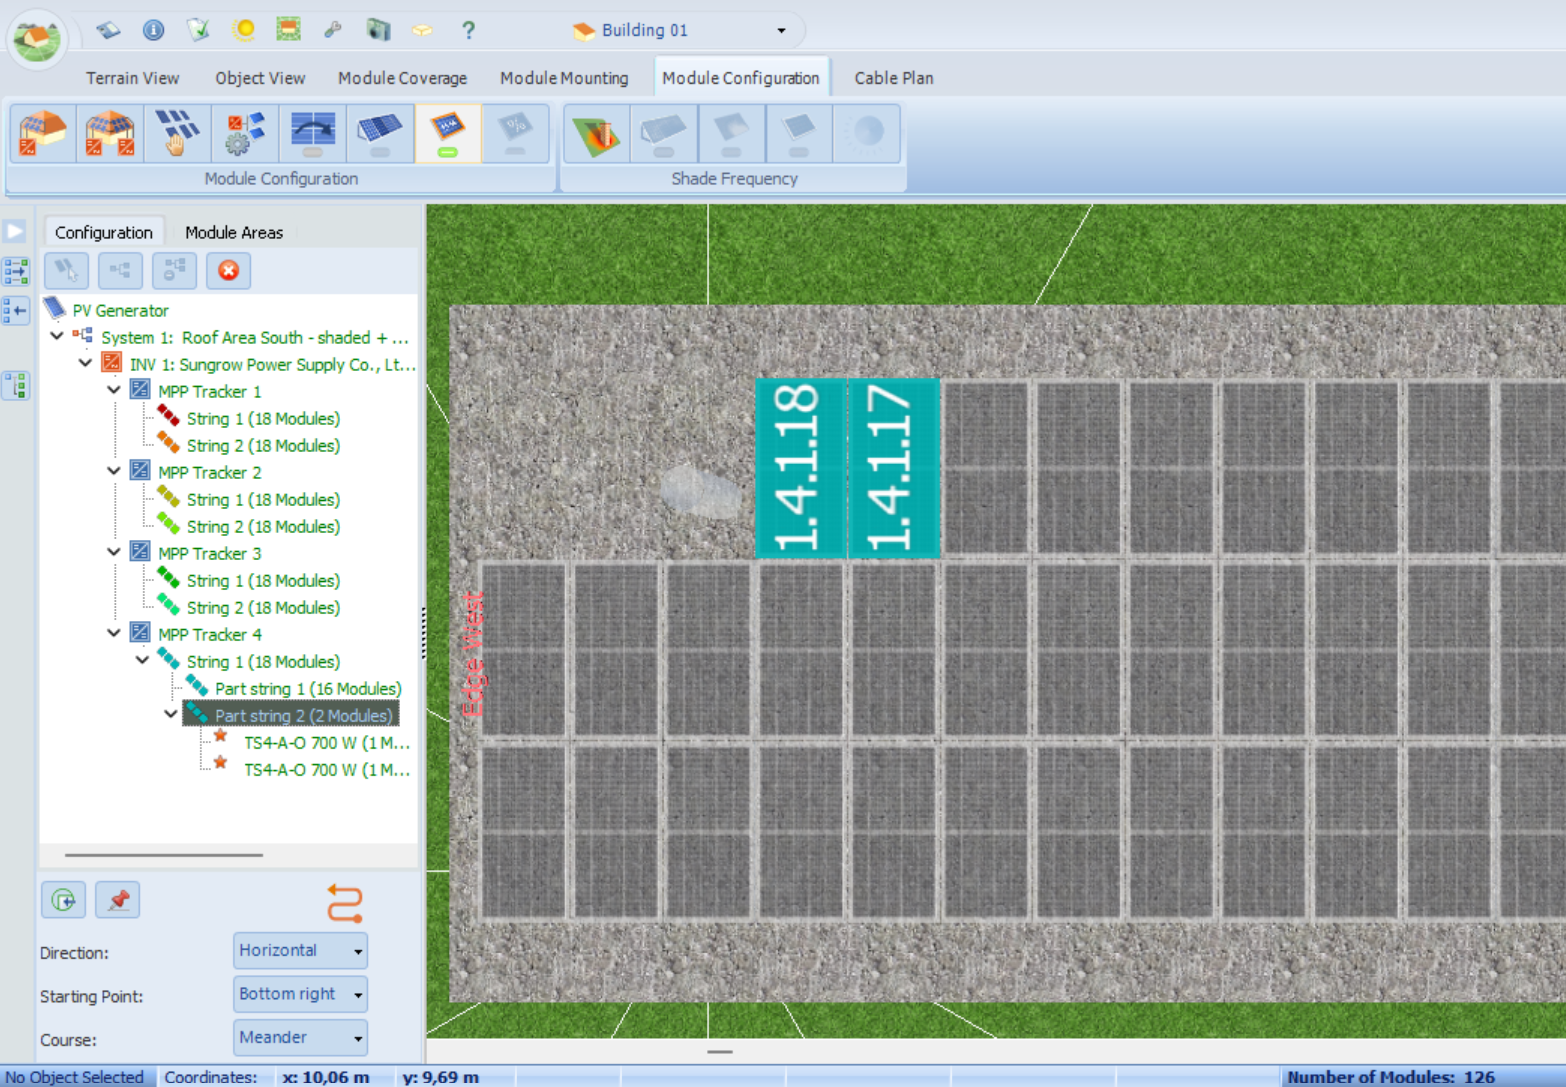
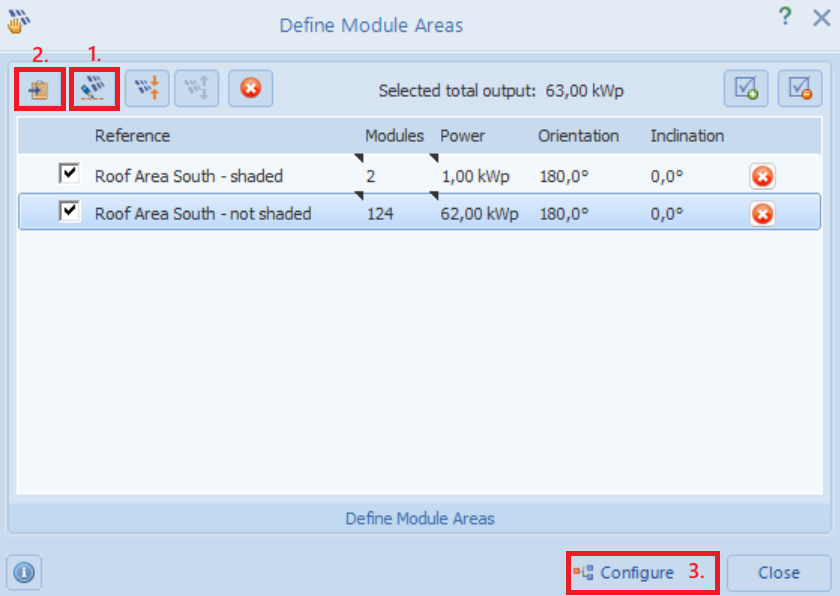
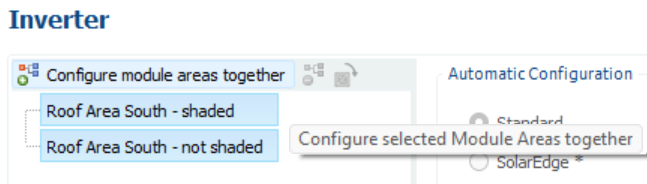
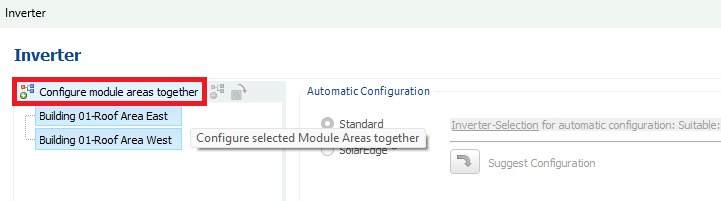
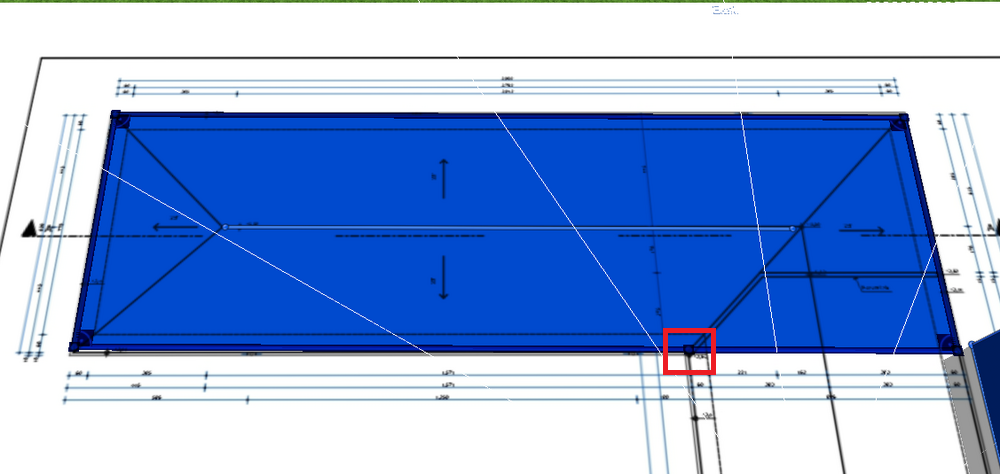
Using the example of a vent that shades two modules (with >1%): First, define a separate module area for the two shaded modules. Ensure that PV modules can be selected individually. Select both modules and right-click to choose "Add to 'Define Module Areas' dialog." Click "Define Module Areas for Configuration." In the "Define Module Areas" dialog: Rename the module area to "Roof Area South - shaded." Import all other modules and rename them to "Roof Area South - not shaded." Click "Configure." Next, in the inverter configuration window, select both module areas and choose "Configure module areas together": Now select the desired inverter, choose the polystring configuration (for one of the four MPP trackers), check the box for "Power optimizers," and assign the two module areas as follows: The two modules with optimizers are then correctly assigned in the string diagram:


-
The module tilt and orientation are influenced by two factors: the tilt of the mounting system and the pitch of the roof. Together, these two tilts determine the resulting module tilt and orientation. This can be visualized as follows: If you were to place a ball on the module surface, it would not roll exactly in the direction of the mounting system due to the two tilts, but would instead roll in the direction of the roof pitch. This is the resulting module orientation. The steeper the roof pitch, the greater the deviation of the resulting module orientation from the orientation of the mounting system. For example, if you have a mounting system facing south on a west-facing roof, the ball will not roll south, but southwest.
-
Hello Antonia, Thank you for your inquiry. The user license is not bound to one device. You can install PV*SOL on multiple devices and use it with the same sign-in details, but it is not permitted to use the program simultaneously on multiple devices. The Valentin License Portal is an online portal in which license managers can independently manage their company’s user licenses and assign them to license users. You can assign several license users to a license, but there can only be one active license user per license. You can find a detailed explanation in our help section.
-
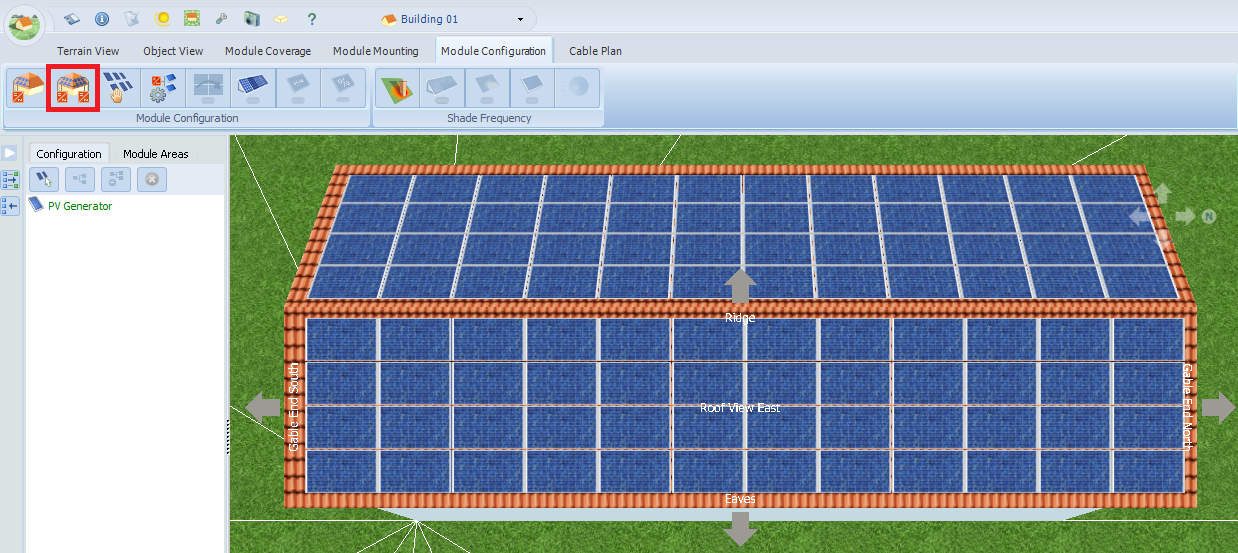
Hallo, vielen Dank für Ihre Anfrage. In der 2D-Planung finden Sie das Symbol für die Wechselrichter-Verschaltung in der Hauptmenü-Leiste: In der 3D-Planung wechseln Sie erst in die 3D-Umgebung: Dort finden Sie den Reiter "Modulverschaltung": Die Testversion hat denselben Funktionsumfang wie die Vollversion, mit der einzigen Einschränkung, dass keine Projektberichte heruntergeladen werden können.


-
How can I configure two different roof areas with one inverter?
hotline_oh posted a question in FAQ (Read only)
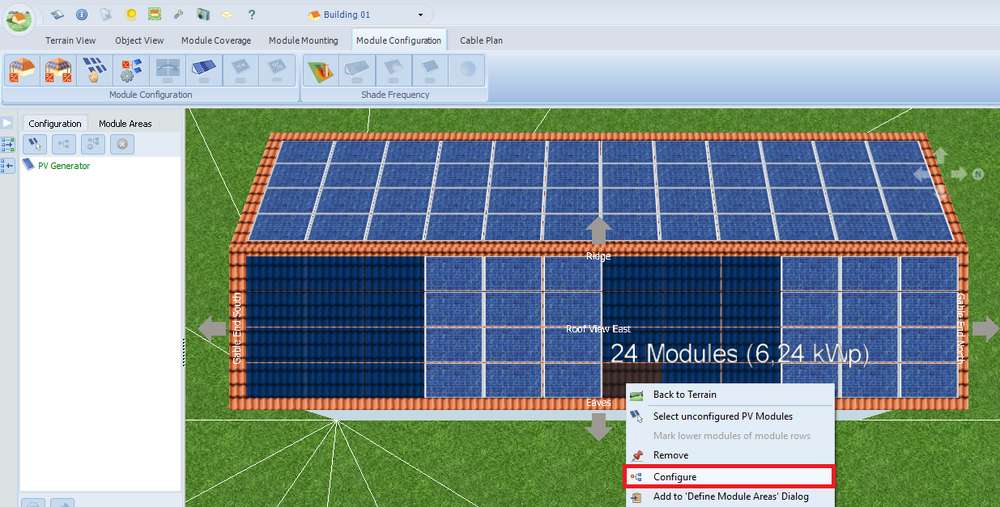
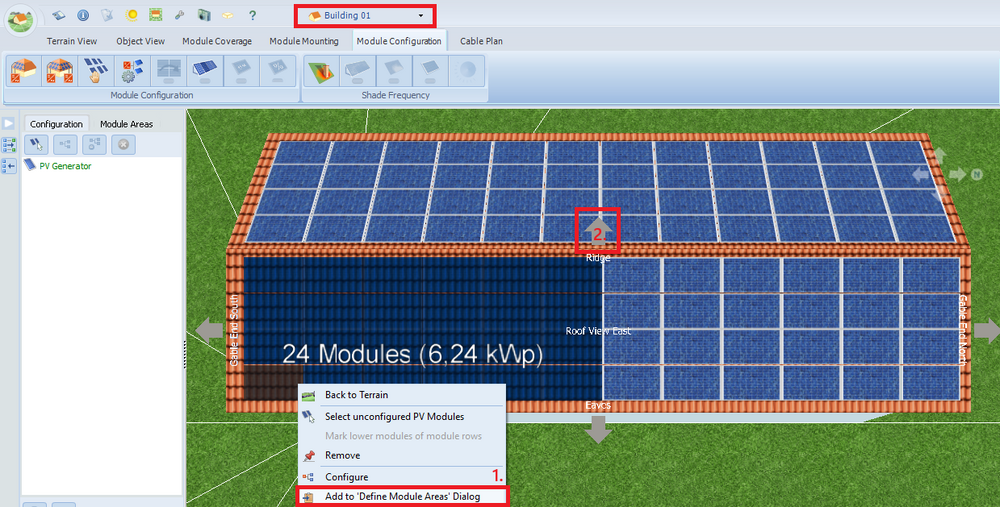
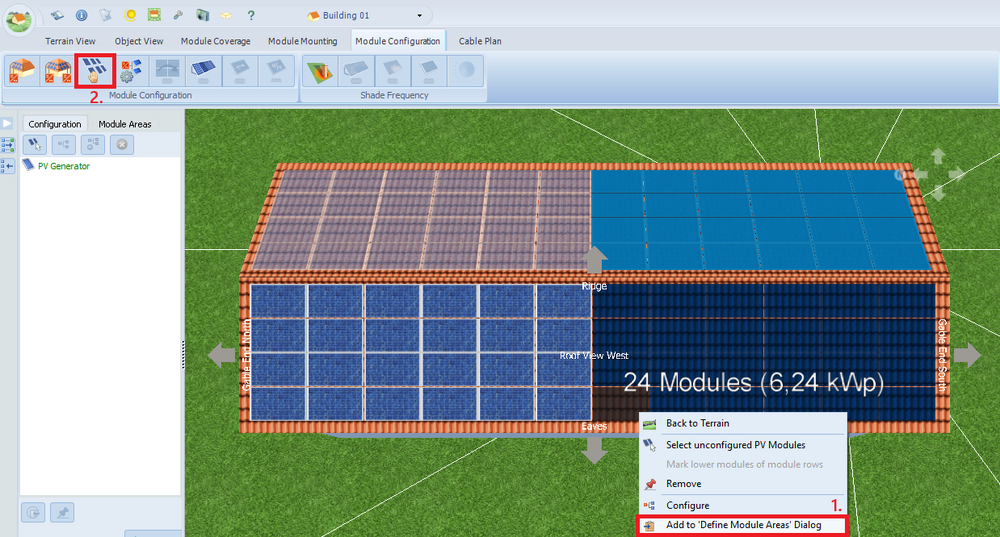
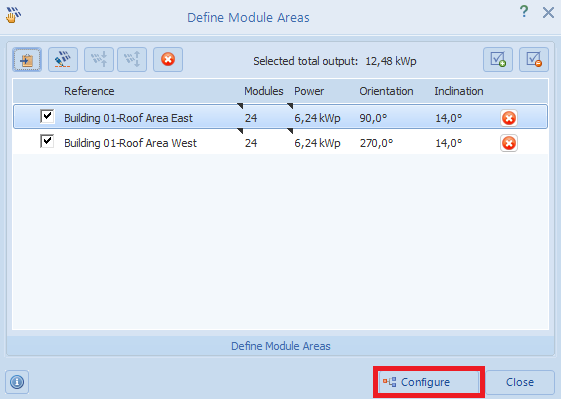
Scenario 1: You can connect all modules on two or more roof areas together using the "Configure all unconfigured modules" button: Scenario 2: To configure several—but not all—modules from the same roof area to a single inverter, first select them by holding down the Ctrl key and left-clicking. Then, right-click and select "Configure": Scenario 3: You can also configure multiple module areas on different roof areas together. First, define which modules should be configured together. Select the desired modules from the first module area, right-click on the selected modules, and choose "Add to 'Define Module Areas' Dialog." Use the gray arrow to switch to the other side of the same roof. (Or you can use the dropdown menu in the top menu bar to switch to a different building.) Now select the desired modules of the second module area, right-click on the selected modules, and choose "Add to 'Define Module Areas' dialog." Then click the "Define Module Areas for Configuration" button: You can rename the module areas if necessary (right-click → Rename). Then click "Configure": In the inverter configuration window, select both module areas and click "Configure module areas together." You can then select the desired inverter:
-
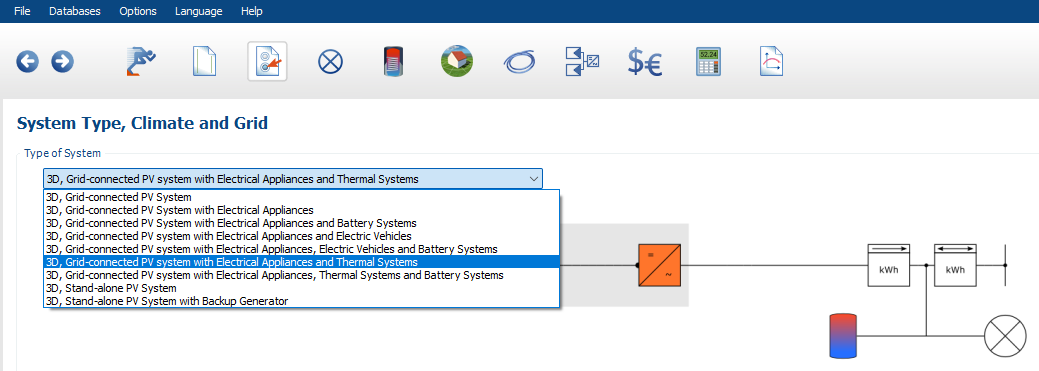
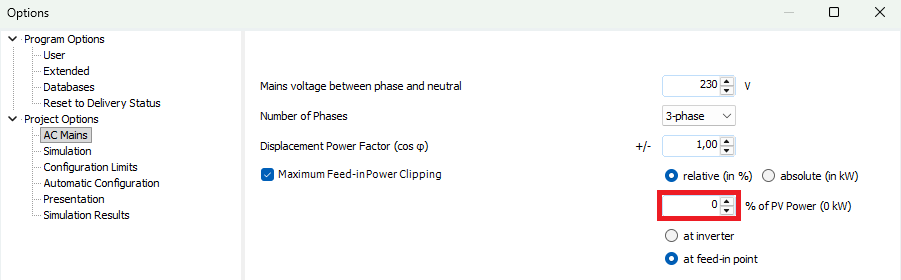
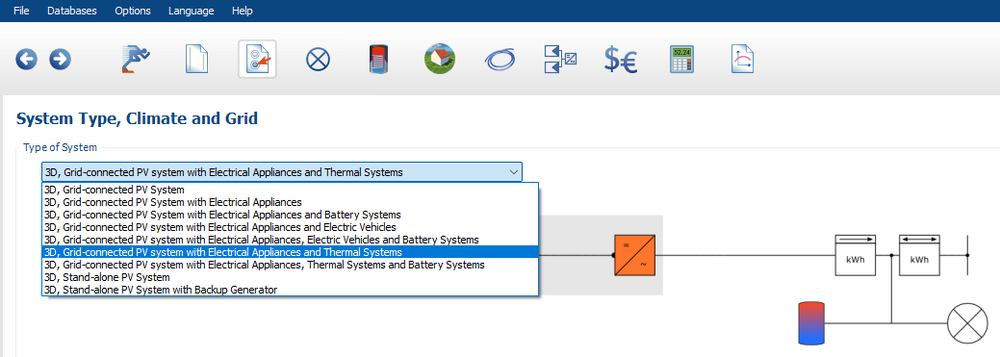
On the "System Type, Climate and Grid" page, you can select the "Stand-alone PV System" (with and without a backup generator) system type. Planning stand-alone systems in PV*SOL is based on the SMA Off-Grid Configurator program, which we originally developed for SMA. This program contains the design rules that SMA has specified for us. These rules cannot be changed or deactivated. For example, only systems with AC-coupled battery systems can be planned; DC systems are unfortunately not possible. We understand that these rules may not necessarily apply to other manufacturers and may entail further limitations. For greater flexibility in component selection and improved transparency during the planning process, we recommend that you initially plan your stand-alone system as if it were a grid-connected system: On the "System Type, Climate and Grid" page, select a grid-connected system. Set the feed-in limit to zero; then no energy will be fed into the grid: The value under "Total consumption covered by grid" indicates the energy that cannot be covered by the PV system. This energy must be provided by the backup generator or (if you are not planning on a backup generator) "approach zero".
-
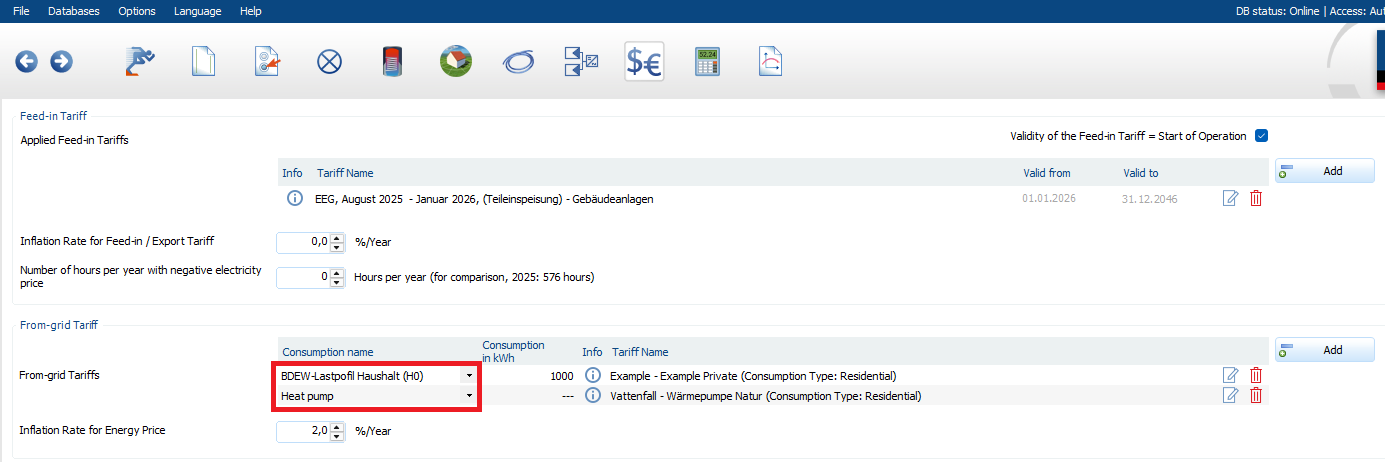
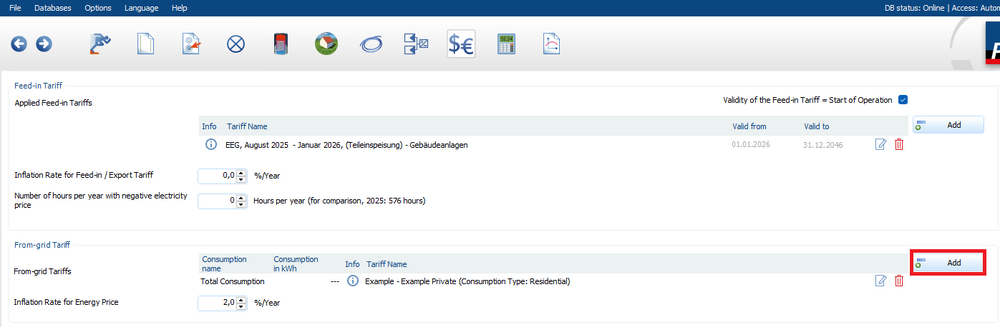
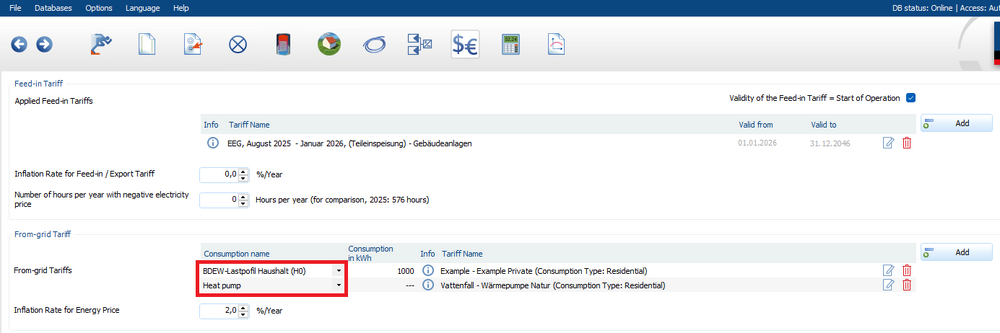
On the "System Type, Climate, and Grid" page, select a system type with a thermal system: After entering information for both consumers (household consumption and heat pump), you can add a second tariff on the "Financial Analysis" page: Now you can assign the corresponding consumer (household consumption or heat pump) to each tariff:
-
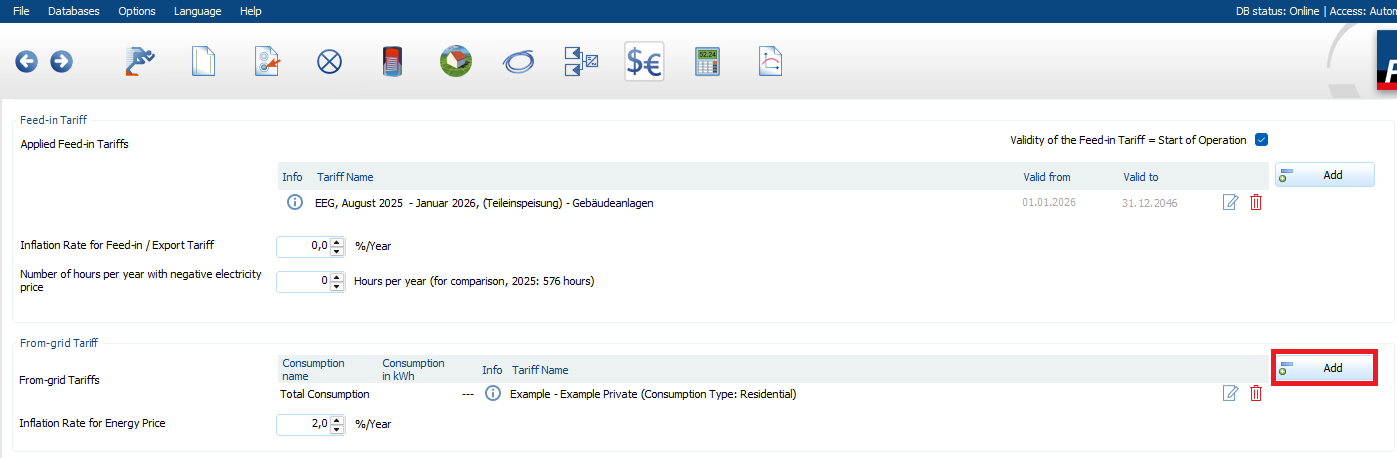
How do I create my own feed-in and from-grid tariffs?
hotline_oh posted a question in FAQ (Read only)
In PV*SOL premium and PV*SOL, please open the tariff database via "Databases" --> "Feed-in Tariffs" or "From-grid Tariffs" and select the "New" icon. Then enter the required data.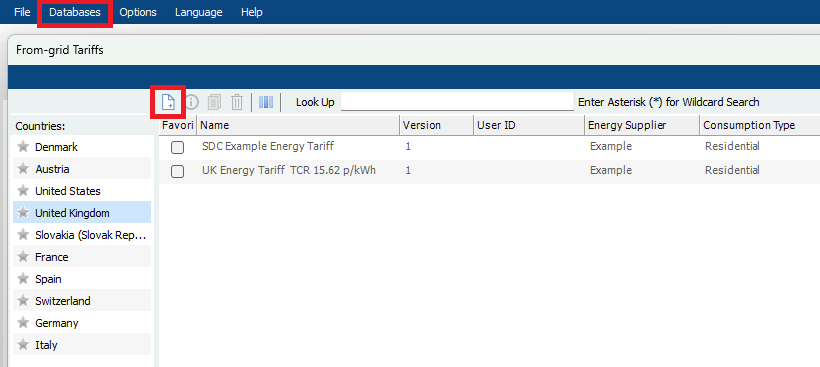
-
Can I adjust the monthly degression of the feed-in tariff?
hotline_oh posted a question in FAQ (Read only)
No, you must select or create the feed-in tariff for each month of commissioning. The tariff files are updated via the database update. -
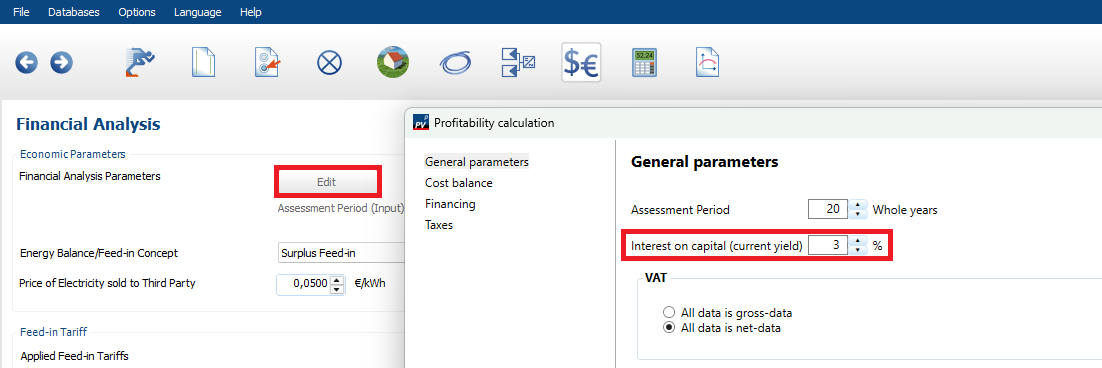
The feed-in tariff shown in the table or graph changes every year, even if you haven't entered any degradation, because it displays the net present value, not the amount of the feed-in tariff. This means that each year's feed-in tariff is discounted back to its initial value using the interest on capital (current yield). If you want to see the feed-in tariff amount over time without interest, set the capital interest to zero.

-
The results presented in the project report, such as annual grid feed-in, specific yield, and CO₂ savings, refer to the first full year of operation.
-
Dear CarlSEL, Thank you for your inquiry. If you have already created a cable plan and subsequently make changes to the configuration, the cable/string diagram is not always updated. You must then delete the cable plan (press the ‘Delete all cables’ button), switch back to the Module configuration page and then back to the Cable plan page. Everything is then updated and the cables run in accordance with the configuration.
-
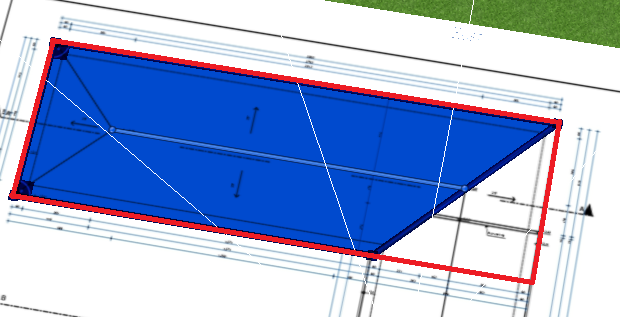
Hello, Thank you for your message. Please delete the fifth point of the polygon. The rectangular polygon may only consist of four points.
-
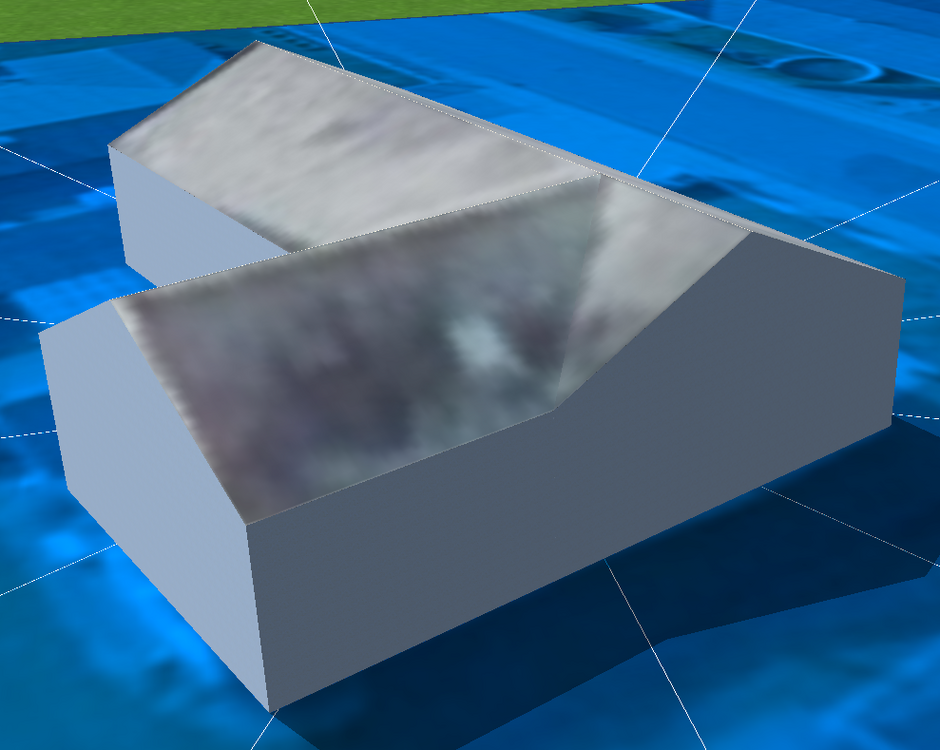
Hello, Thank you for your inquiry. To create this L-shaped building, draw several polygons and extrude the buildings one after the other. You deactivate the collision (right-click on the roof) and move the buildings towards or into each other. The polygons must be rectangular so that PV*SOL recognizes them as a gable or hipped roof: This tutorial explains how to draw an L-shaped building. To watch the tutorial in English, you can select the "English" audio track in the YouTube settings.
-
Dear Anders, Thank you for your inquiry. To create this L-shaped building, draw several polygons and extrude the buildings one after the other. You deactivate the collision (right-click on the roof) and move the buildings towards or into each other. This tutorial explains how to draw an L-shaped building. To watch the tutorial in English, you can select the "English" audio track in the YouTube settings. Please find enclosed the project file we have edited. Karin og Bent VAL.pvprj
-
Hallo Joceblaze, vielen Dank für deine Nachricht. Bitte nutze WeTransfer oder SwissTransfer, um uns die Datei zukommen zu lassen.
-
Dear J. Esteban, Thank you for your inquiry. Unfortunately, there is no other way to display large module areas. We will forward your request to our development team.
-
Hallo F.Hiecke, vielen Dank für deine Nachricht. Wir werden den Hersteller Sigenergy kontaktieren und um Eintragung der fehlenden Produkte (Sigen Hybrid Wechselrichter TP2 mit 1-6 Batteriemodulen) in unsere Datenbank bitten.
-
Dear Alexandre, Thank you for your inquiry. Unfortunately, it is not possible to define seasonal temperature settings. We have informed our development team about your requirement.
-
Guten Tag, vielen Dank für Ihre Anfrage. Eine Legionellen-Schaltung kann ich T*SOL und in PV*SOL berücksichtigt werden, jedoch leider nicht in GeoT*SOL. Das Entwicklungsteam hat Ihren Wunsch aufgenommen. Wenn Sie sich die Testversion von T*SOL herunterladen, könnten Sie den Mehrverbrauch für den Legionellenschutz beispielsweise wie folgt abschätzen: 300 Liter, T_soll = 50 °C, für Legionellenschutz auf 60 °C aufheizen ohne Legionellenschutz: Kessel: 2742 kWh/a, Verluste 366 kWh/a mit Legionellenschutz 1x/Woche: Kessel: 2795 kWh/a, Verluste 375 kWh/a (+ 2 % Mehrverbrauch) mit Legionellenschutz 7x/Woche: Kessel: 3151 kWh/a, Verluste 442 kWh/a (+ 15 % Mehrverbrauch) Fazit: Bei deltaT = 10 K sind es etwa 2 % pro Tag extra
-
Guten Tag, vielen Dank für Ihre Nachricht. Bedauerlicherweise ist es nicht möglich, die Anlagenschemata anzupassen. Wir geben Ihre Wünsche, auch die Möglichkeit zum Abbilden eines Nachheizstabs in einem Speicher, an das Entwicklungsteam weiter.
-
Dear CarlSEL, Thank you for your inquiry. Unfortunately, the cable diagram is not available for roof-spanning wiring (as in your case), polystring wiring, or elevated systems. Instead, a string diagram is available, based on the sorting on the Module Configuration page.
-
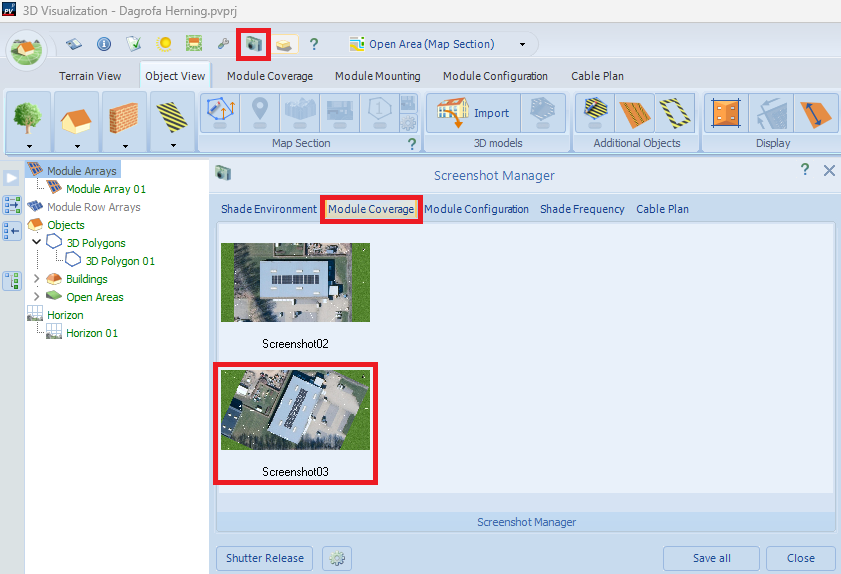
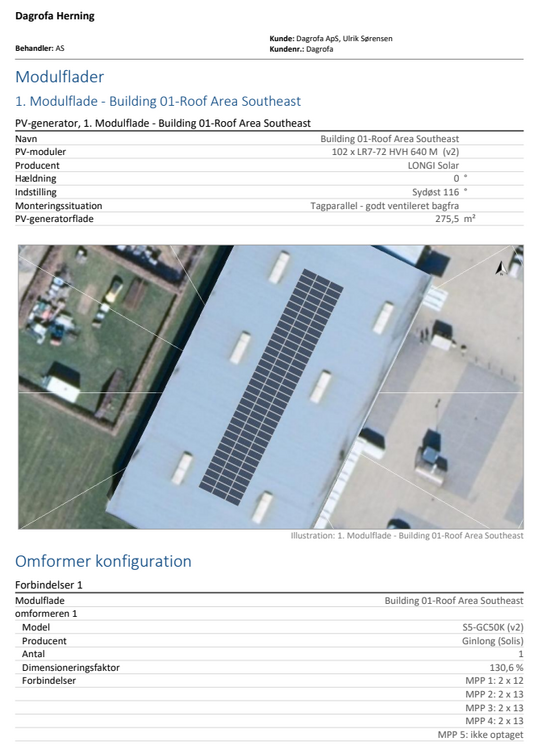
Dear Anders, Thank you for your inquiry. We took another screenshot in the screenshot manager: This one will be included in the project report: The project file we edited is attached. Dagrofa Herning - VAL.pvprj