developer_mh
-
Posts
1,860 -
Joined
-
Last visited
-
Days Won
173
Everything posted by developer_mh
-
 PV*SOL premium 2017– Zwei Gauben an einen Strang verschalten So verschalten Sie zwei Gauben (Modulflächen) an einen Strang: Gehen Sie auf die Seite "Modulverschaltung" Klicken Sie den Button mit dem Hand-Symbol, um das Fenster "Modulflächen definieren" zu öffnen Klicken Sie jetzt den "Importieren" Button , um alle Modulformationen zu importieren Vereinigen Sie die Gruppen, indem Sie den Button "Auswahl vereinigen" klicken. Achten Sie darauf, dass beide Gruppen ausgewählt sind (Häkchen) Klicken Sie auf den "Verschalten" Button Nun sind beide Gauben an einem Strang verschaltet. Vielen Dank fürs Zuschauen!
 -
Dear allan, for mounting systems it is not yet possible to create the cable plan in 3D. However, if you plan your mounting system in 3D and go back to 2D, you can enter your cable lengths and other details on the page "Cables" when you select the detailed option. In the info dialog at the bottom of the page you'll find a summary of all cables and other components. Hope that helps, let me know if you need any other assistance. Kind regards, Martin
-
Hallo Gerald, wäre es möglich, das Projekt zu sehen? Gerne per PN an mich oder hier posten (nachdem sensible Daten entfernt wurden). Ohne das Projekt ist es leider schwer, etwas dazu zu sagen.. und ich verschiebe die Frage mal ins deutsche Forum, ok? Beste Grüße, Martin
-
Dear sunlightfuture, Thank you for your suggestions! We will take both ideas on our list for the next release planning. Right now we are not working on fine tuning the battery cahrge/discharge scheduling mechanisms, but I think that your ideas make perfectly sense and we should consider them for the future. So, what you would need is an option to restrict the battery discharge to a specific period of time an option to restrict the grid charge to a specific period of time Is that correct? Or would you need other/more options? Kind regards, Martin
-
Hallo BeckerF, vielen Dank für die Anmerkung und Entschuldigung für die etwas späte Antwort. Bei der Erstellung der Lastprofile für die Wärmepumpen haben wir uns bemüht, möglichst allgemeingültige Annahmen zu treffen, damit die Profile auf breiter Basis anwendbar sind. Uns ist jedoch bewusst, dass diese Profile nicht auf jeden Anwendungsfall zutreffen. Aber Sie haben Recht, eine Einschätzung, ob das gewählt Lastprofil den eigenen Anforderungen entspricht, fällt leichter, wenn man grundätzliche Angaben zu den Profilen hat. Wir werden die Infos in einer der nächsten Versionen in den Kommentaren mit ausliefern. Hier schon mal die Daten: Über den Jahresenergiebedarf können Sie dann die Pastprofile grob skalieren, um sie an Ihren Bedarf anzupassen. Ich hoffe, das hilft erstmal weiter. Beste Grüße, Martin
-
Hi allan, thanks a lot for your question. It is not directly possible to extrude a curved building like that. But as shown in the example project "3D_Barrel_Roof.pvprj" you can accomplish a similar roof by editing various segments of a complex roof to match a quasi-circular shape. In the example here I have four segements, the second one is highlighted: This example only roughly follows the circular shape, but I think you get the idea. In the end you'll have several segments of the "round" roof that are flat surfaces and have differing inclinations, but then you can place modules on them. Again, I would recommend to look at the example project "3D_Barrel_Roof.pvprj" where you can see how it is done. And please, if you have further questions, don't hesitate to ask! Kind regards, Martin

-
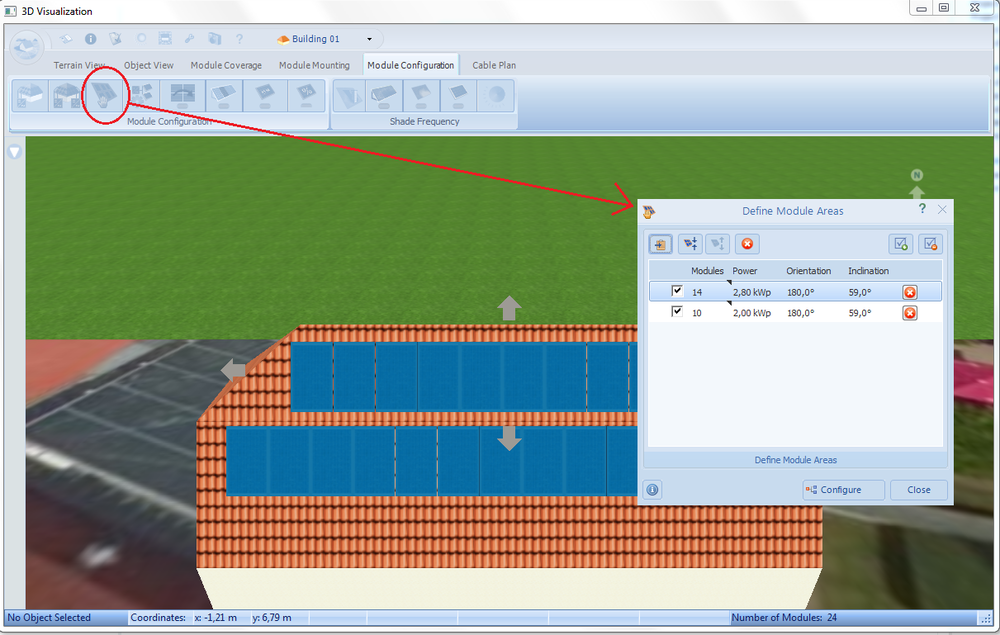
Hey Designer0916, you can place your modules on both parts of the half hipped roof and if they have the same inclination, you can connect them together like so: right click on each module area and select "Add to 'Define Module Areas' Dialog" Then go into the 'Define module areas' dialog in the 'module configuration' tab: From the small icons on top, choose 'combine selection' (this is only possible, if the modules have the same inclination and orientation, of course) Then click 'configure' at the bottom and you'll be able to connect both of them to one inverter. Hope that helps, kind regards, Martin
-
Hallo MaS! Einfach mit der Maus über den grauen Rand links neben dem Textfeld fahren, bis der Mauszeiger zu einem Rechts-Links-Pfeil wird. Dann klicken und gedrückt halten und mit der Maus das Fenster auf die gewünschte Größe ziehen. Beste Grüße, Martin
-
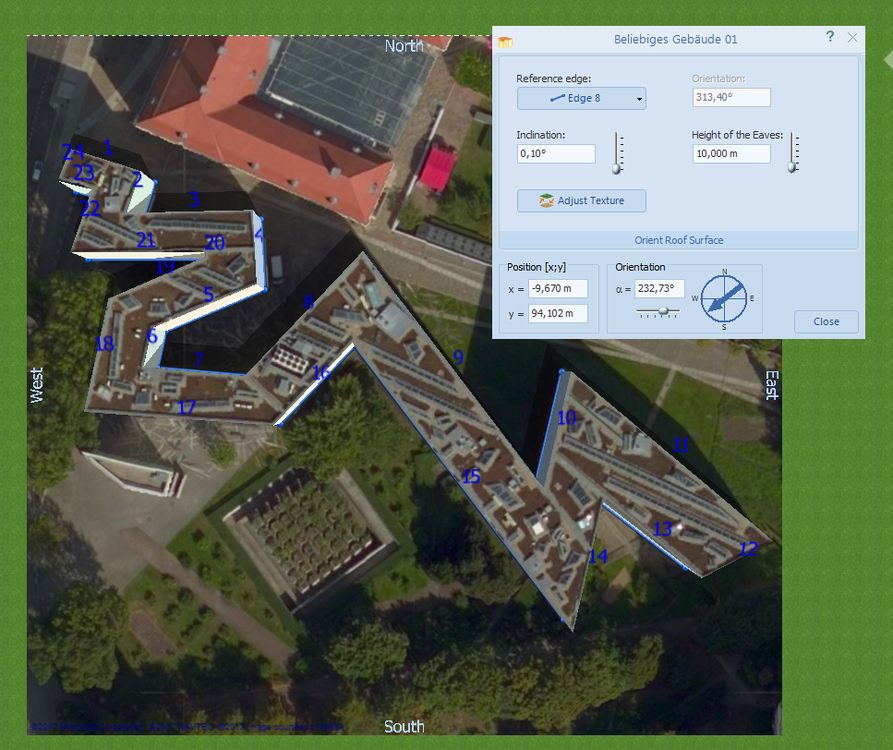
Dear Matt, thanks a lot for your question! When you place module areas on roof tops, they will be aligned parallel to the reference edge of the roof. In this example I selected edge 8 to be my reference edge: Then the modules will be placed in parallel to this edge: Note: if you work with reference edges, be sure to define your reference edge first before constructing other objects on the roof (or area). However, when you place module mountings on roof tops, you can enter the orientation of the mounting structures in relation to the selected reference edge in the module mounting dialog: Hope that helps, kind regards, Martin

-
Dear robharris, Thanks a lot for your question. HTW is stands for the University of Applied Sciences of Berlin ("Hochschule für Technik und Wirtschaft" in German). The research group led by Prof. Dr. Volker Quaschning published a detailed analysis and recommendations for the storage size (both in terms of power and energy): Parts of the study in English Website of the research group Kind regards, Martin
-
Hallo Luigi, es verhält sich mit der Einspeiseabregelung zum Glück nicht so, wie Sie befürchten. Die Einspeisung wird nicht immer um konstante 75% gemindert, sondern nur abgeregelt, wenn sie einen Maximalwert übersteigt. Diesen Maximalwert kann man eben in Prozent der installierten PV-Leistung (DC), also die kWp, angeben. Wenn Sie bei Ihnen also 75% eingeben und eine installierte Leistung von 2,65 kWp haben, wird nur abgeregelt, wenn die momentante Leistung 2kW übersteigt. Insofern denke ich, könnten Sie das so nutzen. Beste Grüße ins Tirol, Martin
-
Hallo Luigi, danke für die Neujahrs-Grüße und ebenso viele Grüße zurück! Ihnen auch ein frohes Neues, totz dass wir schen Februar haben Die 2kW vom Heizstab müssten Sie auf die 2,65 kWp von der PV-Anlage beziehen, ja. Also würden Sie dort 75% eingeben. Dann hätten Sie wie gesagt als "Netzeinspeisung" das, was Ihr Heizstab verarbeiten kann und als "Einspeiseabregelung" das, was Sie dann noch übrig haben. Viel Erfolg weiterhin und beste Grüße, Martin
-
Hello Islam, that is strange. Could you check if the inverters are there when you look in the databases under Menu -> Databases? Sometimes, when looking in the database from the inverters page, the view is filtered so that only suitable inverters are shown. Kind regards, Martin ps: I'll delete the other double post, alright?
-
Verhältnis Von Pv-Leistung Zu Batteriewechselrichterleistung
developer_mh replied to Franke's topic in PV*SOL
geht es per privater Nachricht? -
Verhältnis Von Pv-Leistung Zu Batteriewechselrichterleistung
developer_mh replied to Franke's topic in PV*SOL
Hallo Heiko, hier auf den Hilfe-Seiten gibt es ein bisschen Grundlegendes zu den Batterie-Wechselrichtern bei Offgrid-Projekten: https://help.valentin-software.com/pvsol/2018/berechnungsgrundlagen/netzautarke-systeme/ Vielleicht hattest du das aber auch schon gesehen. Weitere Hilfe wäre einfacher, wenn du mir das Projekt zukommen lassen könntest. Andernfalls ist es schwer, etwas zur Auslegung zu sagen. Beste Grüße, Martin -
Thanks a lot for the hint, EcoNRG! We will check that problem and resolve it then. Kind regards, Martin
-
Verhältnis Von Pv-Leistung Zu Batteriewechselrichterleistung
developer_mh replied to Franke's topic in PV*SOL
Hallo Heiko, bei netzautarken Anlagen ist es besonders wichtig, dass die Leistung der einzelnen Komponenten (PV, Batterie, Last, Generator, falls vorhanden) im gleichen Leistungsbereich liegen. Wenn deine PV eine Anlagenleistung von 312 kWp hat (wechselrichterseitig vielleicht 280 kW), dann sollte deine Batterie-Bank auch in etwa diese Anschlussleistung haben, mindestens jedoch die halbe (etwa 140 kW). Andernfalls würdest du die PV-Energie gar nicht in ausreichendem Maße in die Batterie bekommen. Die Meldung ist also als Auslegungshinweis zu verstehen, die uns damals von den Offgrid-Technikern von SMA so übermittelt wurde. Aus deren Erfahrungsschatz aus der Praxis ist einiges bei uns in der Software eingeflossen. Genauso wichtig ist es, dass die Spitzenlast überhaupt von der PV oder den Batterien abgefangen werden kann. Bei einem Verbrauch von 1 051 200 kWh/a hat man ja schon ordentliche Spitzenlasten. Je nach Lastprofil eben, aber Werte um die 250 kW würden mich nicht wundern. Wenn dann die PV das im entscheidenden Moment nicht leisten kann, muss die Last aus den Batterien gedeckt werden, die dafür dann die entsprechende Anschlussleistung haben muss. Deswegen ist es ratsam, leistungsmäßig die Last, die PV, die Batterien und evtl den Backup-Generator im gleichen Bereich zu dimensionieren. Beste Grüße, Martin -
Hi mapula, this message is there to inform you that it is not possible to generate a shadow map, since there are no objects that cast a shadow on your modules. That is, your modules are entirely unshadowed. Sorry for the english sentence not being clear enough, we'll work on that. Kind regards, Martin
-
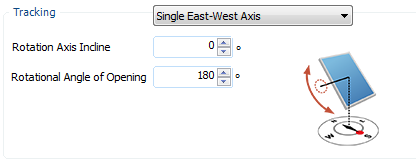
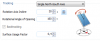
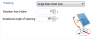
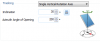
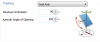
Hi Alfredo, thank you for your question. In the new version (2017 R6, will be published in the next weeks) we will have new pictures in order to make the tracking options and angles clearer. The angles are defined as follows: Single North-South Axis Rotation axis incline: The rotation axis (marked with little red dotted circle) is located on the north-south plane. 0° would be vertical, 90° horizontal. Rotational angle of opening: If entered 160°, the module can rotate by 80° to each side around the rotation axis. Single East-West Axis Rotation axis incline: The rotation axis (marked with little red dotted circle) is located on the east-west plane. 0° would be horizontal, 90° vertical. Rotational angle of opening: If entered 160°, the module can rotate by 80° to each side around the rotation axis. Single Vertical Rotation Axis Inclination: The module has a fix inclination angle that you can choose. The rotation axis is vertical. Azimuth angle of opening: If entered 200°, the module can rotate by 100° to each side (east and west) around the rotation axis. Dual Axis Maximum Inclination: The maximum angle the module can rotate to. 0° is horizontal, 90° will be vertical. Azimuth angle of opening: If entered 200°, the module can rotate by 100° to each side (east and west). I hope this helps a little to clarify the different tracking options and their angles. Kind regards, Martin
-
Drei unterschiedliche Ausrichtungen lassen sich (derzeit) nur an drei unterschiedlichen MPP-Trackern verschalten. Also bräuchten Sie einen Wechselrichter mit mindestens 3 MPP-Trackern. Modulflächen unterschiedlicher Ausrichtung per Leistungsoptimierer in einen Strang zu hängen, wird dann in der mit der Erweiterung möglich sein, an der wir gerade arbeiten.
-
Hallo! Hinweis: Bitte den letzten Post mit aktuellen Informationen beachten! Die Leistungsoptimierer können derzeit nur in der 3D Planung verwendet werden, tut mir leid. Richtig Sinn machen diese Bauteile ja auch erst bei Verschattung durch nahe Objekte, die in der Planung ohne 3D nicht angemessen genau simuliert werden kann. Wir arbeiten derzeit aber an einer umfassenden Erweiterung für Leistungsoptimierer, die es dann auch möglich machen wird, Leistungsoptimierer für die Verschaltung auf der Wechselrichter-Seite zu verwenden, um so wenigstens die Vorteile der LO in dieser Hinsicht ohne 3D abbilden zu können. Beste Grüße, Martin
-
Hallo Luigi, ein frohes neues Jahr wünschen wir! Ein vorgefertigtes Lastprofil für einen 2kW Heizstab ist mir auch nicht bekannt. Es wäre in Ihrem Anwendungsfall ja auch eher so, dass die überschüssige PV-Energie mit maximal 2kW in den Heizstab geleitet werden würde. Also handelt es sich dabei eher weniger um ein Lastprofil im eigentlichen Sinn. Welche Ergebnisgröße wünschen Sie sich dann nach Ende der Simulation? Wenn es Ihnen nur darum geht, zu sehen, wieviel (elektrische) Energie Sie übers Jahr in den Heizstab stecken können, könnten Sie eine normale netzgekoppelte Anlage mit einer Einspeiseabregelung auf 2kW simulieren. Dann wäre die Energie, die unter "Netzeinspeisung" in den Ergebnissen geführt wird, diejenige, die Sie in den Heizstab stecken könnten. Wenn Sie eher eine thermische Betrachtung möchten, wäre unsere Software T*SOL die passendere Lösung. Beste Grüße von Berlin ins schöne Tirol Martin
-
Hi Rob, glad you solved the problem! So perhaps you want to update the premium 7.0 R5 version, it is now two years old... And just in case you consider doing this: we have software maintenance offers that ensure you always have the latest version of our software (and databases) without placing financial burdens on you Kind regards, Martin
-
Hey Rob, here is a quick sketch to illustrate the usage factor: So, the usage factor will be (width of PV) / (distance of trackers). Hope that helps. Also, east-west tracking means that the axis of rotation goes from east to west. If you want to have your trackers rotated around the north-south axis, you would use the north-south tracking option. And no, the tracking option should definitely be there. Did you upgrade to the lastet version (i.e. PV*SOL premium 2017 R5) ? Kind regards, Martin

-
Hallo Solarkind, das freut uns natürlich, dass Sie jetzt mit PV*SOL arbeiten! Wir hoffen, es gefällt Ihnen und ist Ihnen eine Hilfe. Viele Ergebnisgrößen sind im Glossar in unserer Hilfe erklärt, die Sie durch drücken von F1 aus dem Programm heraus erreichen. Oder hier online: https://help.valentin-software.com/pvsol/glossar/ Gerne gebe ich Ihnen aber eine kurze Erläuterung hier: Spezifische Jahresertrag Jahresertrag der PV-Anlage in kWh / Nennleistung (DC) der PV-Anlage in kW (oft kWp = "Kilowatt peak" genannt). Also sagt der spez. Jahresertrag aus, wieviel Energie meine Anlage pro installiertem kw Leistung bringt. Anlagennutzungsgrad wird oft auch Performance Ratio genannt. Das ist eine Größe, die beschreibt, wie gut die Anlage funktioniert, bzw wieviel Energie verloren geht, z.B. durch Verschmutzung, ungünstige Verschaltung etc. Ein Anlagennutzungsgrad von 100% heißt, dass sie absolut ideal läuft, was in der Realität nahezu unmöglich ist. Gut sind Werte von 80% oder mehr. Die Berechnung erfolgt über die tatsächliche PV-Energie geteilt durch die theoretisch mögliche. Die theoretisch mögiche PV-Energie ergibt sich aus der Einstrahlung aufs Modul und dem Nenn-Wirkungsgrad nach STC. Eigenverbrauchsanteil Der Teil der PV-Energie, der selbst verbraucht wird. Entweder direkt zur Deckung von Lasten oder zur Speicherung im Batteriesystem oder im Elektro-Auto. Leichter zu merken ist es vielleicht so: Der Teil der PV-Energie, der nicht ins Netz eingespeist wird, ist der Eigenverbrauchsanteil. Autarkiegrad Der Teil des Jahres-Verbrauchs, der nicht aus dem Netz gedeckt werden muss. Netzeinspeisung Die Netzeinspeisung ist der Teil der PV-Energie, der nicht zur Deckung des Verbrauchs, zur Speicherung in der Batterie oder zum Laden des Autos verwendet werden kann. Abgezogen wird dabei natürlich die Einspeiseabregelung, falls eine eingestellt wurde. Wenn Sie weitere Fragen zu den Berechnungen haben, können Sie sich gerne jederzeit hier melden. Beste Grüße, Martin